- Clean Home
- Clean
- Tips For Cleaning Earbuds
Tips For Cleaning Earbuds
and Headphones
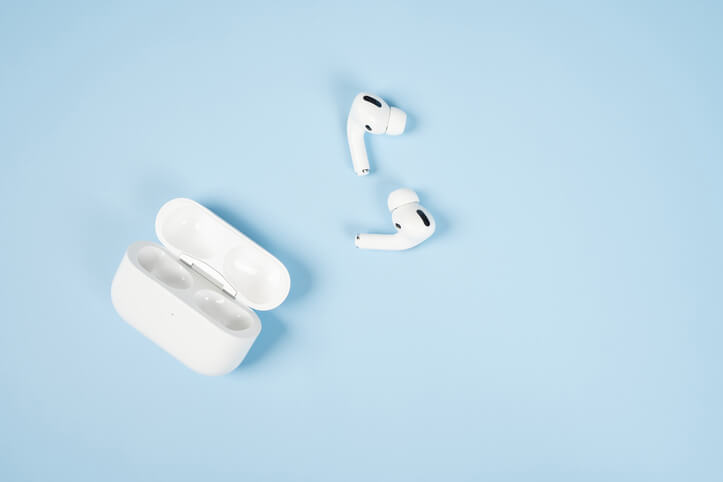
Tips for cleaning earbuds - because smartwatches and fitness trackers aren't the only wearables that need cleaning regularly. Earbuds and headphones need some cleaning TLC, too.
Cleaning earbuds and headphones of lingering earwax and disinfecting surfaces are good practices for hygienic reasons, but they may also improve sound quality.
If you use your headphones while working out, sweat can build up inside and cause them to smell bad. In addition, earwax buildup can clog the drivers and reduce the volume and clarity of sound.
These tips for cleaning earbuds can help to protect your ears - and the sound quality.
Why Cleaning Earbuds and Headphones is Essential
A recent study found that aside from being coated in sweat and wax (gross but true), the average pair of personal in-ear headphones is home to 119,186 CFU, or colony-forming units—more than 2,700 times the bacteria on an average cutting board and 330 times more bacteria than on a kitchen countertop.
Not all headphones in the study were crawling with germs, however. One pair had a CFU count of 20, while another had 830,000 CFU.
Even with such a wide range and the possibility of your headphones falling toward the lower end, researchers concluded that it couldn't hurt to disinfect them every so often.
Common bacteria that can live on your earbuds include Staphylococcus, which can cause a painful ear infection. Then there's all the dirt, bacteria, and other microbes you can't see that might make you sick.
Studies have shown that headphone use increases bacterial growth inside the ear. Clean earbuds and headphones are just more sanitary.
Cleaning Over-Ear Headphones
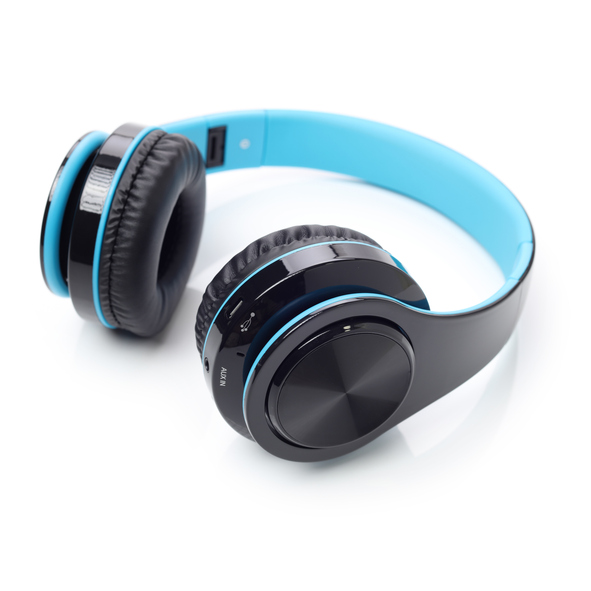
How you clean your over-ear headphones will vary.
Many brands are designed for easy cleaning, with removable cups and cables that unplug at both ends.
If yours are less cleaning-friendly, you'll need to be careful not to damage them. If available, consult the manufacturer's cleaning instructions.
To clean and sanitize over-ear headphones, you'll need:
- Electronics cleaning solution. (To make your own, you'll need a spray bottle, one-half cup each of distilled water, and isopropyl alcohol. Pour the water and alcohol into the spray bottle and shake gently to combine. The solution can be stored in the bottle for up to two months. Label and date the spray bottle.)
- Microfiber cloth
- Cotton swabs
If you have concerns about damaging any fabric on your headphones, first test the cleaning solution on an inconspicuous area.
- Start by removing the ear cups from the headphones (if possible) to access the mesh below more easily.
- To de-germify, grab the electronics cleaning solution, spray it lightly on a microfiber cloth, and wipe away any stuck-on grime, bacteria, and other nasties from both ear cups and the rest of the headphones.
- Lightly spray a cotton swab with the cleaning solution and work it into any nooks and crannies (i.e., areas like fabric folds) on both ear cups.
- Extend the headphones as far as possible and wipe the exterior and any buttons, volume dials, or remotes you use with a microfiber cloth dampened with the cleaning spray. Spend some extra cleaning time on the area where you grip the headphones while putting them on and taking them off.
- Dab a cloth or cotton swab with a cleaning solution and wipe to clean the mesh on the main speakers. If your headphones have a microphone (like a gaming headset, for example), clean the mesh and adjust the arm with the cleaning solution.
- Wipe down any cables, including the rubber grip near the jack, with a microfiber cloth dampened with the cleaning solution.
- Allow the headphone components to air-dry before you reassemble and use them.
Tips For Cleaning Earbuds
In-ear headphones (earbuds) are generally less hygienic because you put them inside your ear. Thanks to their silicone tips, some sit deep in your ear canal to form a seal.
While the sound is superior, these devices have a greater risk of getting an ear infection. To clean and sanitize earbuds, you'll need:
- Wooden toothpicks
- Blu-Tack (or similar adhesive putty)
- Cotton swabs
- Isopropyl alcohol
- Paper towels or microfiber cloths
- Electronics cleaning solution (see above)
If your earbuds have removable silicone ear tips, remove and clean them separately after each use, being careful not to tear the silicone.
- Clean each ear tip's surface and interior holes with an isopropyl alcohol wipe.
- To remove earwax in the holes, work it free with a toothpick. To disinfect, wrap a toothpick in an alcohol wipe and carefully work it around each hole. Afterward, set them somewhere safe to air dry.
- Press some Blu-Tack (or similar adhesive putty) along the speaker mesh to clean the grille parts. Pull quickly to remove dirt or wax, and repeat until the speaker mesh is clean. To disinfect the speaker mesh, dip a cotton swab in rubbing alcohol and wipe down the surface thoroughly. This should also help loosen any remaining grip for easy removal. Clean speaker mesh is not only more sanitary; it may also improve sound quality.
- To clean the drivers entirely, dampen a paper towel or microfiber cloth with an electronics cleaning solution (see above) and clean around any sensors (like the ear-detection sensors on Apple AirPods).
- Wipe down any cables, remotes, or the rubber grip near the jack with a clean cloth dampened with the cleaning spray. Allow the alcohol solution to evaporate before you store or wear your earbuds. Alcohol dries quickly, so you shouldn't have to wait long - about 60 seconds.
With these tips for cleaning earbuds and headphones, keeping your electronics sanitary isn't that difficult, after all! It just requires knowing the safest sanitizing solution for each type.
By regularly sanitizing your tech toys, you're helping to keep yourself healthy and protect the health of those you encounter daily.
You Might Like These:
How to Clean Brick
Brick is one of the most lovely design accents a home can have. Whether indoor or out, however, it gets dirty. Really dirty. Here's how to clean brick.
Cleaning to Control Allergy Symptoms by Housecleaning
Here's the dirt on cleaning to control allergy symptoms and prevent asthma and allergy triggers in your home so you and your family can breathe easier.
A House Cleaning Schedule That Works in Less Time
A house cleaning schedule that works. Until someone out there introduces a universally free service, this house cleaning schedule can help you make quick work of cleaning.
A Weekly Home Cleaning Routine for Busy Bodies
This weekly home cleaning routine for busy bodies provide ways to maximize every cleaning minute you have.
How to Clean Lamps and Shades
How to clean lamps and light fixtures to allow your home to get all that expensive wattage you're paying for. Here's how to safely clean lamps and lamp shades.
Resolutions for A Cleaner New Year
A cleaner, tidier home ineedn't consume your life. Even if you abhor a vacuum you can do it right - and fast with these 7 resolutions for a cleaner new year.
Hiring a House Cleaning Service
Hiring a house cleaning service. We all want a clean house. We don't always have time to clean it, however. These tips for hiring a house cleaning service can help.
How to Clean Your Phone
How to clean your phone, tablet, and other touchscreens.

- Clean Home
- Clean
- Tips For Cleaning Earbuds