How to Clean Light Fixtures
Without Making a Bigger Mess

When was the last time you cleaned your light fixtures?
Not changed a light bulb. Not flicked a cobweb off the chandelier while carrying a laundry basket.
Actually cleaned them.
If you can't remember, you're in excellent company.
Lighting fixtures have a remarkable ability to collect dust, grease, dead insects, and mysterious little bits of debris while remaining almost completely invisible on the household cleaning radar.
Until one day you look up.
And wonder how long that spider has been paying rent.
The good news is that cleaning light fixtures usually takes less effort than you think, provided you know what materials you're working with and don't attempt to wash anything that's still connected to electricity.
These 15 tips will help you clean ceiling lights, chandeliers, pendants, lamps, and other fixtures safely, without turning a simple cleaning job into an electrical adventure.
Before You Start: A Few Important Safety Rules
Light fixtures combine electricity, glass, delicate finishes, and awkward reaching positions. Not exactly the ideal combination for improvisation.
Before cleaning:
- Turn off the light and allow bulbs and fixture surfaces to cool completely.
- For anything beyond light exterior dusting, disconnect the power at the breaker or unplug the lamp, as appropriate.
- Follow the manufacturer's cleaning instructions.
- Never spray cleaner directly onto a light fixture.
- Keep water away from sockets, wiring, switches, and electrical connections.
- Use a stable ladder appropriate for the task.
- Never stand on chairs, countertops, or other improvised platforms.
- Don't attempt to disassemble hardwired fixtures unless the manufacturer specifically provides safe user instructions.
If a fixture is damaged, has exposed wiring, shows signs of overheating, or is difficult to access safely, stop and contact a qualified electrician or appropriate professional.
A clean chandelier is lovely. An emergency-room visit is a less appealing home improvement project.
1. Start With a Dry Microfiber Cloth
For many fixtures, dry dusting is all that's needed. Use a clean microfiber cloth to gently wipe accessible surfaces.
Microfiber traps dust instead of sending it floating around the room. For ceiling fixtures, a suitable extendable duster may help you reach the exterior without climbing.
Just avoid putting pressure on delicate shades or fittings.
And don't dust hot bulbs. They won't appreciate it, and neither will your fingers.
2. Clean Ceiling Light Fixtures Carefully
Ceiling-mounted lights are easy to ignore because they're above eye level. Unfortunately, dust doesn't care whether you can see it.
For accessible ceiling fixtures:
- Turn off the light and disconnect power as appropriate for the cleaning task.
- Allow the fixture to cool.
- Dust the exterior with a microfiber cloth.
- If the manufacturer permits removing the cover, support it carefully while releasing the fasteners.
- Clean the removable cover according to its material.
- Dry it completely before reinstalling.
- Make sure the cover is securely attached.
Don't force stuck covers or remove unfamiliar electrical components.
If you can't determine how a shade comes off, consult the fixture's manual rather than treating it like a puzzle you must solve with a screwdriver.
3. Wash Removable Glass Light Shades
Glass shades can accumulate dust, fingerprints, and a surprising amount of grime. If the manufacturer permits removal and washing, cleaning them separately is often easier.
Here's how:
- Disconnect power as appropriate and let the fixture cool.
- Carefully remove the glass shade.
- Place a towel in the sink to cushion the glass.
- Wash with warm water and a little mild dish soap.
- Use a soft cloth or sponge.
- Rinse if appropriate for the material.
- Dry thoroughly with a lint-free cloth.
- Reinstall only when completely dry.
Don't immerse shades with electrical components, decorative coatings, glued-on elements, or materials that aren't designed to get wet.
And be especially careful with antique, painted, or specialty glass. A pretty finish can disappear much faster than the dirt you're trying to remove.
4. Remove Dead Bugs From Enclosed Ceiling Lights
Some ceiling fixtures seem to double as insect retirement communities. You remove the cover and discover a collection of tiny winged visitors who apparently checked in years ago.
For a removable, manufacturer-approved glass cover:
- Disconnect power and let everything cool.
- Remove the cover carefully.
- Empty loose debris into the trash.
- Wash or wipe the cover according to its care instructions.
- Dry completely.
- Reattach securely.
Avoid shaking debris into the fixture's electrical housing. And if insects repeatedly accumulate inside, check whether the cover is properly seated.
Don't seal ventilation openings or modify the fixture to keep insects out. The manufacturer designed those openings for a reason.
5. Clean Pendant Lights Without Scratching Them
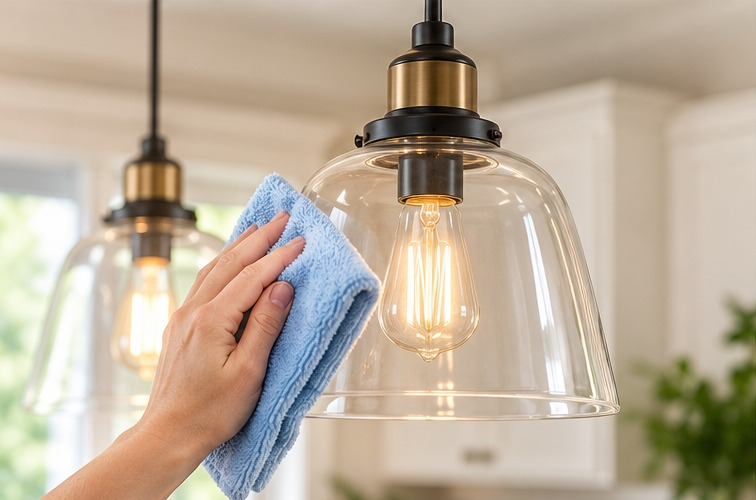
Pendant lights often hang directly over kitchen islands and dining tables.
Which means they collect dust, fingerprints, and sometimes a thin coating of airborne cooking grease.
Start with dry dusting. For washable exterior surfaces, use a lightly dampened microfiber cloth if the manufacturer permits it.
Then dry immediately.
Pay attention to the material:
- Glass may tolerate gentle washing.
- Painted metal may need only a soft, dry cloth.
- Brass or specialty finishes may require specific care.
- Fabric or woven shades may need dry cleaning methods.
Never spray cleaning solution upward toward the fixture. Gravity has a habit of directing liquid into exactly the places you don't want it.
6. Give Chandeliers a Gentle Cleaning
Chandeliers can be beautiful. They can also have approximately 4,000 surfaces that collect dust.
Fortunately, you don't need to dismantle the entire fixture every time you clean it. For routine maintenance:
- Turn off the fixture and let it cool.
- Use a soft microfiber cloth or suitable gentle duster.
- Support delicate components while cleaning.
- Work slowly from the upper sections downward.
- Avoid pulling on hanging ornaments or electrical parts.
For removable crystals or decorative pieces, follow the manufacturer's instructions.
Some can be cleaned individually. Others have finishes or attachments that make wet cleaning unsuitable.
If the chandelier is large, heavy, high above the floor, or difficult to reach, professional cleaning may be the safest choice.
There's no household-cleaning trophy for balancing on a ladder while holding a crystal teardrop.
7. Clean Crystal Light Fixtures Without Leaving Streaks
Crystal fixtures show fingerprints and residue more readily than many other materials.
Use a clean, soft, lint-free cloth.
If the manufacturer permits damp cleaning, lightly moisten the cloth with an approved cleaning solution rather than spraying the fixture.
Gently wipe each accessible crystal and dry it promptly. Avoid abrasive cleaners, rough sponges, and aggressive polishing.
Some decorative pieces have coatings that can be damaged by ordinary glass cleaners.
And remember: crystal doesn't need to sparkle so brightly that passing aircraft mistake your dining room for a runway. It just needs to be clean.
8. Remove Grease From Kitchen Light Fixtures
Kitchen lighting can develop a sticky film from cooking oils and airborne grease. Dust then sticks to that film.
Before long, your pendant lights have developed a coating that no one ordered.
For washable, non-electrical surfaces:
- Disconnect power as appropriate and let the fixture cool.
- Dust loose debris first.
- Use a soft cloth lightly dampened with mild soapy water, if permitted.
- Gently wipe the greasy areas.
- Remove soap residue with another barely damp cloth when appropriate.
- Dry thoroughly.
Avoid soaking metal finishes, seams, and decorative components.
For heavy grease buildup on delicate or expensive fixtures, consult the manufacturer's instructions or a professional.
The trick is to remove grease without damaging the finish beneath it.
9. Dust Fabric Lampshades
Fabric lampshades need a different approach from glass or metal. Water can leave stains, distort the shape, or damage the adhesive holding the shade together.
For routine cleaning:
- Turn off and unplug the lamp.
- Allow the bulb to cool.
- Use a soft brush or lint roller if appropriate.
- A vacuum with a soft brush attachment on low suction may work for sturdy fabric shades.
- Support the shade gently while cleaning.
Test any method on a hidden area first. Don't scrub fragile fabrics or delicate trims.
And avoid spraying fabric freshener on the shade. Your lampshade doesn't need perfume. It needs dust removal.
10. Clean Glass and Metal Table Lamps
Table lamps are usually easier to clean because you can reach them without risking your relationship with gravity.
Unplug the lamp first. Then:
- Dust the base and shade.
- Wipe washable exterior surfaces with an appropriate cloth.
- Remove fingerprints from glass where permitted.
- Clean around decorative details gently.
- Dry everything thoroughly.
Keep moisture away from the socket, cord, switch, and electrical connections.
If the lamp has a wood, marble, brass, or specialty finish, use a method appropriate for that material. One cleaner does not rule them all.
11. Don't Forget Bathroom Light Fixtures
Bathroom lighting has a special talent for collecting dust, hairspray residue, and moisture-related grime.
Vanity lights are especially vulnerable because they're close to sinks and mirrors.
For accessible exterior surfaces:
- Turn off the light and allow it to cool.
- Dust the fixture.
- Wipe washable surfaces with a lightly damp cloth if permitted.
- Clean removable glass shades separately when appropriate.
- Dry completely.
Avoid allowing moisture into electrical openings.
If you notice rust, corrosion, flickering, or moisture inside a fixture, don't simply clean over the problem.
Have it evaluated by a qualified professional. Bathrooms and electricity are not an area where you want to experiment.
12. How to Clean Light Bulbs
Dusty bulbs can make a fixture look neglected. But bulbs require careful handling.
Turn off the power and let the bulb cool completely. Gently wipe the exterior with a dry, soft cloth.
Don't touch or disturb damaged bulbs.
If you're dealing with a broken fluorescent or CFL bulb, follow the appropriate cleanup guidance for that bulb type.
Sometimes replacing a damaged bulb is the safer solution.
13. Outdoor Light Fixtures
Porch lights, patio fixtures, and exterior sconces face a different set of challenges. They collect dust, pollen, cobwebs, insects, and weather-related grime.
For accessible fixtures:
- Turn off power and allow surfaces to cool.
- Remove cobwebs with a soft brush.
- Wipe the exterior using the manufacturer's recommended method.
- Clean removable covers only when permitted.
- Dry and reassemble securely.
Never direct a hose or pressure washer at an electrical fixture.
If you notice water inside the housing, damaged seals, corrosion, or exposed wiring, have the fixture inspected.
And if reaching the light requires an extension ladder, consider hiring someone equipped for the job. The porch light isn't worth a fall.
14. Avoid These Common Light-Fixture Cleaning Mistakes
A few cleaning shortcuts can create expensive problems.
Spraying cleaner directly onto fixtures
Liquid can enter sockets, seams, or electrical components.
Apply approved cleaner to a cloth instead.
Cleaning while the fixture is hot
Hot bulbs and glass can cause burns, and sudden temperature changes may damage some materials.
Using abrasive scrubbers
These can scratch glass and ruin decorative finishes.
Forgetting to dry removable parts
Moisture should never be trapped inside a reassembled fixture.
Taking apart unfamiliar fixtures
If the manufacturer doesn't provide clear instructions, don't improvise.
Using an unstable ladder
A chair is not a ladder. Neither is the kitchen counter.
And standing on a rolling office chair to reach a ceiling light is an especially poor career decision.
15. Add Light Fixtures to Your Regular Cleaning Routine
The easiest way to keep light fixtures clean is to stop waiting until they're visibly coated in dust.
You don't need to wash every fixture every week.
Instead, build a simple maintenance routine.
Weekly or as needed: Dust easily accessible lamps and exterior fixture surfaces.
Monthly: Check frequently used fixtures for dust, fingerprints, and insects.
Seasonally: Give accessible ceiling lights, pendants, and decorative fixtures a more thorough cleaning according to their care instructions.
As needed: Clean kitchen fixtures when grease begins accumulating and bathroom fixtures when residue becomes noticeable.
Adjust the schedule based on your home. A busy kitchen may need more frequent attention than a rarely used guest bedroom.
What Cleaning Products Should You Use?
You don't need a cabinet full of specialty products.
For most routine light-fixture cleaning, a few basics will do.
- Microfiber cloths: For dusting and gentle wiping.
- Soft brush: For delicate details and some fabric shades.
- Mild dish soap: For washable removable parts when permitted.
- Lint-free cloth: For drying glass and polished surfaces.
- Vacuum with soft brush attachment: For suitable sturdy fabric shades.
Always check the manufacturer's instructions before applying liquids or cleaning chemicals.
Avoid abrasive pads, harsh solvents, and cleaners that aren't approved for the fixture's finish. And never mix cleaning chemicals.
Light-Fixture Cleaning Checklist
Use this when you're tackling lighting throughout the house.
- Turn off lights and allow them to cool.
- Disconnect power or unplug as appropriate.
- Check manufacturer instructions.
- Gather microfiber cloths and suitable cleaning supplies.
- Dust accessible ceiling fixtures.
- Clean removable glass shades where permitted.
- Dust pendant lights.
- Gently clean chandeliers.
- Dust table lamps and lampshades.
- Wipe kitchen fixture grease where appropriate.
- Clean bathroom vanity lights.
- Check outdoor fixtures.
- Dry all washable components completely.
- Reassemble removable covers securely.
- Restore power only when everything is dry and properly reassembled.
The Bottom Line: Look Up Once in a While
Cleaning lighting fixtures isn't the most glamorous household chore. It's also one of those jobs that makes a room feel noticeably fresher once it's done.
Dust disappears. Glass looks clearer. The kitchen pendants stop looking like they've been dipped in cooking oil. And the dining room chandelier may finally sparkle again.
The key is to clean gently, follow the manufacturer's instructions, and respect the fact that you're working around electricity.
You don't need to tackle every fixture in one afternoon.
Start with the lights you use most. Work your way around the house. And occasionally look up. You might be surprised by what's been living above your head.
Keep Going
Keep the rest of your home looking its best with these related guides:
- Speed Cleaning Your Home: Make your house look noticeably cleaner in just 30 minutes.
- Weekly House Cleaning Checklist: Stay on top of routine household cleaning.
- House Cleaning Schedule: Create a manageable routine for your home.
- Easy Home Decorating: Make your rooms look better without a major makeover.
- Home Maintenance Tips: Handle the household jobs that keep everything working.
- Cleaning Tips and Guides: Explore more practical cleaning advice.
- Clean Home
- Clean
- Cleaning Lighting Fixtures