How to Clean a Washing Machine—and Get Rid of That Smell
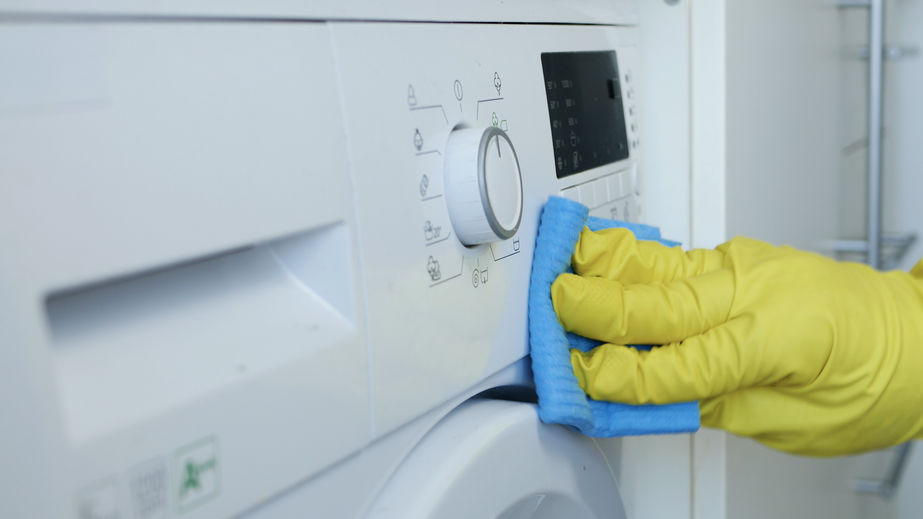
Your washing machine cleans things for a living.
It's therefore mildly offensive when it starts to smell.
You open the door expecting the reassuring scent of freshly washed laundry and instead get something closer to Damp Basement, the fragrance.
Or you notice residue in the detergent dispenser.
A suspicious film around the door gasket.
Little bits of something you'd prefer not to identify.
At this point, it's reasonable to ask:
Shouldn't the washing machine be cleaning itself every time I use it? Unfortunately, no.
Detergent residue, fabric softener, dirt, lint, body oils, minerals, and moisture can accumulate inside a washer over time.
Front-load machines can be particularly prone to musty odors when moisture remains around the door and gasket.
The solution isn't complicated.
Your washing machine occasionally needs a wash too.
Here's how to do it without turning laundry day into an appliance-repair experiment.
First: Check Your Washing Machine Manual
Before pouring anything into your washer, find the manufacturer's cleaning instructions.
This matters.
Modern washing machines vary considerably.
Your machine may have:
- A dedicated self-clean cycle
- A tub-clean cycle
- Specific cleaning-product recommendations
- Restrictions on bleach or other cleaners
- A removable detergent dispenser
- A pump filter that needs periodic cleaning
- A filter that is not intended for routine homeowner access
- Specific instructions for cleaning the door gasket
If you no longer have the paper manual, look up the model number on the manufacturer's website.
Follow those instructions over generic internet advice—including mine.
Your washer's manufacturer knows more about your washer than somebody's viral baking-soda video.
How Often Should You Clean a Washing Machine?
No universal schedule fits every washer.
How often yours needs cleaning depends on:
- How frequently you do laundry
- The type of machine
- The detergent you use
- How much detergent you use
- Whether you use fabric softener
- Water conditions
- Whether the machine stays damp between loads
- Manufacturer recommendations
Some machines alert you when it's time to run a cleaning cycle.
Otherwise, use your manual's recommended schedule and pay attention to what the machine is telling you.
If the washer smells musty, the dispenser is coated with residue, or the gasket is getting grimy, don't wait for a ceremonial date on the calendar.
Clean it.
Before You Start
Make sure the washing machine is empty.
Remove stray socks, coins, tissues, and anything else that's managed to establish residency inside.
Gather whatever your machine's instructions call for.
You may need:
- Soft cleaning cloths
- A small soft brush
- Mild soap
- A manufacturer-approved washing-machine cleaner
- Gloves when appropriate
- A shallow container or towel if cleaning an accessible pump filter
You probably don't need twelve products. We're cleaning an appliance. We're not opening a laboratory.
Step 1: Clean the Detergent and Fabric-Softener Dispensers
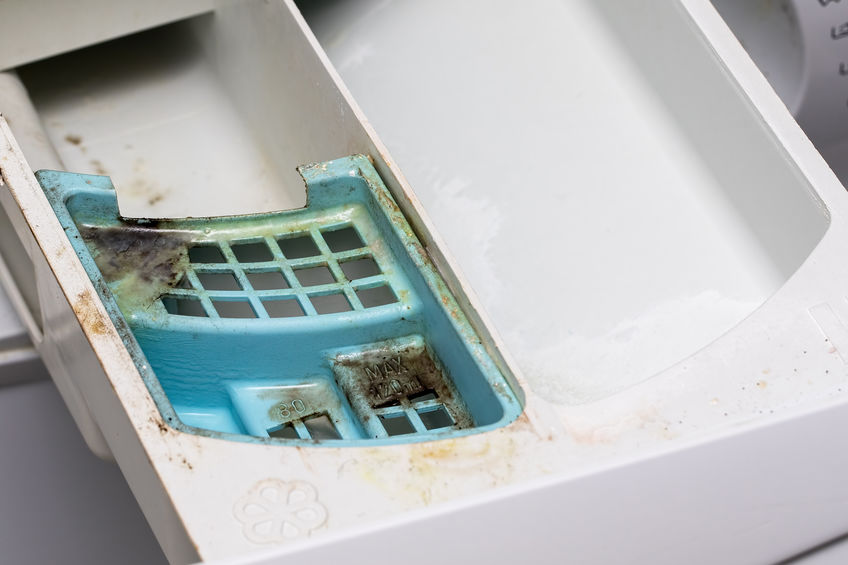
Start where the products go in.
Detergent and fabric-softener dispensers can build up thick, sticky residue—especially when you use too much product.
If your dispenser is removable, take it out according to the manufacturer's instructions.
Clean it using the recommended method.
That may involve warm water, gentle wiping, and a soft brush for difficult corners.
Rinse and dry as directed before replacing it.
If the dispenser isn't removable, clean the accessible areas carefully without forcing components apart.
And take a good look at how much detergent you've been using.
If the compartment looks like it's forming its own geological formation, more detergent may not be the answer.
Step 2: Clean a Front-Load Washer Gasket
If you have a front-loader, inspect the rubber gasket around the door.
Pull back the folds gently where the manufacturer permits and look for:
- Hair
- Lint
- Detergent residue
- Small objects
- Standing water
- Mold or mildew-like growth
- The occasional coin
- Something that may once have been a tissue
Wipe the gasket according to your machine's care instructions.
Pay particular attention to the folds where water and debris collect.
Then dry the gasket thoroughly.
Don't use abrasive scrubbers or random chemicals on the rubber seal.
Damaging a washer gasket while cleaning it would be an impressively expensive form of housekeeping.
Step 3: Check the Washer Filter
Some washing machines have a user-accessible drain-pump filter that catches lint, coins, hair, and small objects.
Others are designed differently.
Do not start unscrewing panels because an article told you washing machines have filters.
Check your manual.
If your machine has a user-cleanable filter, follow the manufacturer's instructions for:
- Locating it
- Draining residual water if necessary
- Removing it
- Cleaning it
- Reinstalling it correctly
Put towels or a shallow pan underneath if the instructions recommend it.
There may be water.
Potentially considerably more water than your optimism anticipated.
Step 4: Run the Washer's Cleaning Cycle
Many newer machines have a cycle labeled something like:
Clean Washer
Tub Clean
Self Clean
Use it according to the manufacturer's instructions.
Use only the cleaning product and amount recommended for your machine.
If the manufacturer recommends a washing-machine cleaning tablet or another specific cleaner, follow those directions.
Don't add laundry. This cycle is for the washer. For once, the washing machine gets the load all to itself.
An easy maintenance option: Affresh Washing Machine Cleaner tablets are designed specifically for washing machines and can be used for periodic cleaning without measuring or mixing a cleaner.
Follow the package directions and your washer manufacturer’s cleaning instructions.
What If Your Washer Doesn't Have a Cleaning Cycle?
Check the manual for the recommended cleaning procedure.
The manufacturer may specify a particular empty cycle, water temperature, and cleaning product.
Don't assume that selecting the hottest possible cycle and adding whatever is under the sink is the same.
Different machines use different materials, seals, and internal components.
Follow the instructions for yours.
Should You Clean a Washing Machine With Vinegar?
Vinegar is recommended in countless household-cleaning articles.
That does not mean it belongs in every washing machine.
Some appliance manufacturers discourage acidic products because they may affect certain components over time.
So before putting vinegar into your washer, check the manufacturer's instructions.
If your manufacturer approves it for a specific cleaning procedure, follow those directions.
If it doesn't, don't replace the owner's manual with internet enthusiasm.
Vinegar is useful.
It is not the elected leader of household cleaning.
What About Baking Soda?
Same rule.
Don't automatically pour baking soda into your washing machine because you've seen it used in homemade washer-cleaning recipes.
Check the manufacturer's instructions.
Products that seem harmless in a sink may not be appropriate for every appliance or cleaning cycle.
Your washing machine has pumps, hoses, sensors, seals, and other components that your kitchen sink does not.
Treat it accordingly.
Can You Use Bleach to Clean a Washing Machine?
Some washing machine manufacturers allow chlorine bleach for specific cleaning procedures.
Others may recommend different products or instructions.
Follow your manual.
If bleach is approved, use only the recommended amount and cycle.
And this is critical:
Never mix chlorine bleach with vinegar, ammonia, or other household cleaning products.
Combining incompatible cleaners can create dangerous fumes.
Use one cleaning method at a time and follow the product and appliance directions.
A smelly washer is irritating.
Step 5: Wipe the Drum
After the cleaning cycle is complete, inspect the drum.
Wipe accessible surfaces with a clean cloth if needed and if your machine recommends it.
Pay attention to any remaining residue.
If there's still a strong odor or visible buildup after the manufacturer's recommended cleaning procedure, you may need to repeat the approved process or investigate another cause.
Don't immediately respond by doubling the cleaner.
More isn't automatically better.
Sometimes more cleaner is precisely how the residue got there.
Step 6: Clean the Door or Lid
Wipe the inside and outside of the washer door or lid with a suitable damp cloth.
Pay attention to:
- Handles
- Edges
- Hinges
- Glass
- Seams
On a front-loader, clean the inside of the glass where detergent film and lint can collect.
Dry everything afterward.
This is not the most consequential step.
It is, however, satisfying.
Step 7: Wipe the Outside
While you're there, give the exterior a quick wipe.
Clean the:
- Control panel
- Top
- Sides you can easily reach
- Knobs or buttons
- Handle
Follow the manufacturer's recommendations, and don't spray liquid directly onto controls or electrical areas.
When recommended, spray an appropriate cleaner onto the cloth rather than enthusiastically misting the control panel.
Electronics and household-cleaning exuberance are poor roommates.
Why Does My Washing Machine Smell?
A musty washing machine usually points to some combination of moisture and buildup.
Possible contributors include:
- Detergent residue
- Fabric-softener buildup
- Dirt and body oils
- Debris in the gasket
- A dirty dispenser
- A clogged or dirty user-accessible filter
- Water remaining in the machine
- Keeping the washer closed while it's still damp
- Using too much detergent
- Plumbing or drainage problems
Start with routine cleaning.
If the smell persists, investigate rather than disguising it.
Laundry fragrance isn't a repair technique.
You're Probably Using Too Much Detergent
This is worth checking.
More detergent does not automatically mean cleaner clothes.
Excess detergent can leave residue on clothing and inside the washer.
High-efficiency machines in particular are designed to use relatively little water and require compatible detergent used in the proper amount.
Follow:
- Your washing-machine instructions
- Your detergent label
- The appropriate amount for the load, soil, and water conditions
Do not pour detergent until your ancestors whisper, “That's enough.”
Measure it.
For more help choosing detergent, see Liquid vs. Powder Laundry Detergent.
Don't Overload the Washer
Overfilling the machine can prevent clothing from moving and rinsing properly.
It can also contribute to poor washing results.
Follow your washer's loading instructions.
A washing machine is not a suitcase.
Sitting on the lid to make everything fit is usually a sign we've gone too far.
Remove Wet Laundry Promptly
Wet clothing sitting inside a closed washer creates exactly the kind of damp environment you're trying to avoid.
Move laundry to the dryer or drying area promptly.
If you forget a load long enough that it smells musty, rewashing may be appropriate before drying.
Don't put musty clothing into the dryer and hope heat will turn it into fresh laundry.
The dryer has many talents.
Time travel is not one of them.
Let the Washer Dry Between Loads
If your washer manufacturer recommends it and it's safe in your household, leave the door or lid open or ajar after use so the interior can dry.
For front-loaders, wipe excess moisture from the door and gasket when needed.
Also leave the detergent dispenser open to dry if the manufacturer recommends doing so.
One caution:
An open washing machine can present a safety issue for small children or pets.
Household safety outranks washer ventilation.
If leaving the machine open isn't safe in your home, follow the manufacturer's alternative recommendations.
Don't Leave Detergent Residue Sitting Around
If detergent or fabric softener spills into the dispenser area, wipe it up.
Clean buildup before it becomes a permanent architectural feature.
This is particularly useful with concentrated products.
A little maintenance now is easier than excavating hardened detergent later.
Front-Load vs. Top-Load Washer Cleaning
The basic goal is the same:
Remove buildup and allow the machine to dry.
But the problem areas differ.
Front-load washers
Pay particular attention to:
- Door gasket
- Gasket folds
- Door glass
- Detergent dispenser
- User-accessible pump filter, if equipped
- Moisture remaining after loads
Top-load washers
Pay attention to:
- Detergent and softener dispensers
- Interior tub
- Lid and rim
- Agitator or impeller areas that the manufacturer says are user-cleanable
- Filters or components identified in the manual
Don't dismantle an agitator or other washer component simply because dirt might theoretically exist underneath it.
There is a point where cleaning ends and appliance repair begins.
Know where that line is.
What If You See Mold in the Washer?
Small amounts of mold or mildew-like buildup can occur where moisture and residue remain, particularly around front-loader gaskets and dispensers.
Follow the manufacturer's procedure for cleaning the affected component.
Wear appropriate protection when handling mold and ventilate as needed according to the cleaning product instructions.
If growth is extensive, keeps returning quickly, or appears to be inside inaccessible parts of the machine, consider professional appliance service.
If mold appears elsewhere in a damp laundry area, investigate the room's moisture problem rather than assuming the washer is the only source.
For bathroom mold specifically, see Bathroom Mold Removal.
What If the Washer Still Smells After Cleaning?
If you've thoroughly cleaned the machine according to its instructions and it still smells, stop adding products.
Check for another problem.
Possible causes include:
- Drainage issues
- Standing water
- Clogged components
- Drain-hose problems
- Plumbing odors
- A dirty pump filter
- Internal buildup you cannot access
- A mechanical problem
At that point, consult the manual's troubleshooting section or contact a qualified appliance technician.
If the odor smells like sewage, burning, overheated wiring, or anything electrical, don't treat it as a normal cleaning issue.
Stop using the appliance as appropriate and get the problem evaluated.
The Five-Minute Washer Reset
You don't need to deep-clean your washing machine after every laundry day.
A few small habits can prevent a lot of buildup.
After you've finished washing:
1. Remove the clothes promptly.
2. Check the gasket on a front-loader.
3. Wipe obvious moisture or residue.
4. Leave the machine open to dry if the manufacturer recommends it, and it's safe to do so.
5. Leave the detergent dispenser open to dry if appropriate.
That takes very little time.
And it's considerably easier than meeting The Smell six months from now.
Washing Machine Cleaning Checklist
When your washer needs attention:
- Empty the washing machine
- Read the manufacturer's cleaning instructions
- Clean the detergent dispenser
- Clean the fabric-softener dispenser
- Wipe the front-load door gasket
- Remove lint and debris
- Clean the user-accessible filter if your model has one
- Run the manufacturer's recommended cleaning cycle
- Use only an approved cleaner and amount
- Wipe the drum if needed
- Clean the door or lid
- Wipe the exterior and controls safely
- Dry accessible damp areas
- Remove wet laundry promptly in the future
- Measure detergent instead of guessing
- Let the washer dry between uses when safe and recommended
Three Things to Stop Doing
If your washer keeps getting dirty or smelly, start here.
Stop using excessive detergent.
It doesn't make laundry twice as clean.
Stop leaving wet clothes in the machine.
Your washer isn't temporary wet-laundry storage.
Stop throwing random cleaning ingredients into it.
Your appliance does not need vinegar, baking soda, bleach, dishwasher tablets, and a lemon all arriving for the same meeting.
Use the method designed for your machine.
The Bottom Line
Cleaning your washing machine doesn't need to become another major household project.
Check the manual.
Clean the dispenser.
Check the gasket if you have a front-loader.
Clean the filter if your particular machine has one intended for homeowner maintenance.
Run the recommended cleaning cycle.
Use the right amount of detergent going forward.
And give the washer a chance to dry between loads when that's safe and recommended.
Most importantly, don't wait until your freshly washed towels come out smelling worse than they went in.
Your washing machine has one job.
Occasionally, you have to help it do it.
Keep Going
To choose the right detergent and avoid unnecessary buildup, see Liquid vs. Powder Laundry Detergent.
For choosing cold, warm, or hot water, see What Temperature Should You Wash Clothes?
For stains and everyday fabric care, visit our Laundry & Stain Removal Guide.
For maintaining other hardworking appliances and systems around the house, visit our Home Maintenance Guide.
- Clean Home
- Home Maintenance
- Washing Machine Cleaning Tips