- Clean Home
- Home Maintenance
- Do It Yourself Home Repairs
Do It Yourself Home Repairs

Do it yourself home repairs have two significant advantages: You save time, and you save money.
Of course, you shouldn't attempt to rewire your house or retile your bathroom floor without training, but you can simplify your life by learning to do some essential repairs independently.
What common problems might you be able to solve? Clearing a backed-up toilet is perhaps the most urgent repair, followed by patching small holes in drywall or plaster and recaulking a bathtub.
There are also some elementary household repairs that you can easily tackle with common household items. These are straightforward do it yourself home repairs that you can confidently handle. Here are a few and how to tackle them.
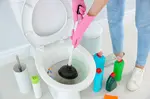
Do It Yourself Home Repairs: Fixing a Backed-Up Toilet

When the toilet water threatens to overflow, or the kitchen or bathroom sink regurgitates, your natural inclination is probably to get as far away as possible from the germs and gunk within and to reach for the phone.
You'll probably get a busy signal—there's a reason plumbers are the busiest repair people around. Be brave: This is one of the more straightforward do-it-yourself home repairs, often fixed in a few simple steps.
Consider the case when the water in your toilet bowl rises above its average level after you flush.
This is not a pretty picture, but if you've got kids who have recently discovered the wonders of toilet paper, it may be familiar.
The first move to keep a bad situation from worsening is to remove the top of the tank and flip the rubber stopper in the bottom back over the drain hole. This will stop the flow of water into the bowl.
Next, snug the plunger cup over the bowl's drain opening and give it a few vigorous pumps.
The idea is to force the obstruction beyond a U-shaped section of toilet pipe, called the "trap," and into the straighter (and broader) drainpipe. The blockage should then flow away, takingwith it any backed-up water.
If your efforts are of no avail, the problem may lie elsewhere in the drainage system. Now that you've ruled out a simple clog, it's time to call your busy plumber.
Meanwhile, don't pour caustic liquid plumbing products into the bowl. That way, the plumber doesn't have to deal with harsh chemicals when making the repair.
One way to prevent such mishaps is to make clear to your family (children especially) that human waste and toilet paper are the only things allowed in the bowl. Keep a small wastebasket near the toilet for disposal of all other items.
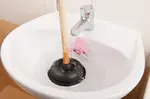
Do It Yourself Home Repairs: Clearing a Stopped-Up Sink

When sinks in the kitchen or bathroom back up, pouring liberal doses of boiling water down the drain will often help by melting greasy clogs.
If that doesn't work, place your handy plunger over the drain opening and perform three or four swift pumps; then pause to see if the sink drains.
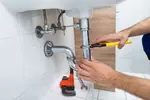
Before calling that busy plumber, try using a liquid drain opener as a last resort. You need to cover the overflow valve near the rim for the tub and bathroom sink drains.
Hold a slightly damp cloth over the overflow valve as you gently push the plunger down. Alternatively, pour some of that liquid drain opener into the primary drain and cross your fingers.
If the drain opener or several short sessions with the plunger won't dislodge the blockage - or if you've noticed that several of your home's other sinks are also draining sluggishly - the problem is likely to be deep inside your main house drain and well out of your reach.
Once again, you'll need that plumber.
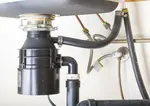
Do It Yourself Home Repairs: Fixing a Stuck Garbage Disposal
If your garbage disposal stops working, the good news is that most disposals have a built-in reset button.
Heavy loads can sometimes cause the motor to overheat. After switching off the disposal and waiting a minute or two, you can press the reset button (usually red) near the bottom of the unit and restart it.
Typically, if a disposal refuses to turn on - unless the drain is filled with garbage - this reset button is the quickest way to get it running again.
If this doesn't work, shut off the disposal unit's power by unplugging it or turning off the circuit breaker if it is hardwired.
Turn the disposal's mechanism with the wrench that comes with it to ensure it's not jammed (the wrench usually fits in a hexagonal recess in the bottom of the disposal).
If it doesn't budge, shine a flashlight down into the disposal to see if you can determine the cause of the jam.
If you don't find anything amiss there or see a lot of water, insert the handle of a broom or plunger into the drain and move the handle back and forth.
This should dislodge the blade, which may be wedged against a piece of silverware, a bottle cap, or some other small item that has fallen unnoticed. Use long kitchen tongs - never use your fingers - to pull the culprit out.
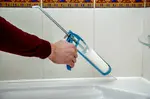
Do It Yourself Home Repairs: Corrective Caulking

A dingy, cracked, or mildewed bathtub or shower caulk can make a sparkling-clean bathroom appear dirty and unappealing. If you've resisted replacing the caulk because it seemed like an extensive home repair job, hesitate no more.
One common mistake people make when they notice that the caulking around a tub or shower stall has become stained or mildewed (or that some have fallen out) is simply spreading a fresh caulk over the dingy or crumbling area.
It does brighten the bathroom—for a week or two. Then, the underlying mildew eats its way up through the new layer of caulk, treating the recent arrival like a little snack.
Before long, you find that you (and your bathroom) are back to dingy and crumbling square one.
However, even the mechanically challenged can usually recaulk the right way by following a few simple steps:
Remove all old caulking material around the tub using a stiff putty knife and a small, inexpensive razor scraper.
Dig out as much old caulk as possible to form a shallow groove along the entire edge between the bathtub and the tile or the tub or shower surround.
Next, thoroughly scrub the area with a bleach-based cleaner and a stiff brush. Rinse thoroughly and allow to dry completely.
A fan temporarily directed at the location will speed up the drying process.
Using a latex-based tub-and-tile caulk in either a squeeze tube or a caulking gun, fill the shallow groove with a thin, continuous bead of caulk.
While the line of caulk is still fresh and before the skin starts to set and harden—within a few minutes, at most—moisten your fingertip and use it to smooth the caulk out and push it thoroughly into any gaps.
Then, carefully wipe any excess caulk with a damp cloth.
The trick is using the least caulk necessary to fill the tiny gap between two materials and surfaces.
When completed, it should be nearly invisible and not protrude any farther than the tile or the edge of the tub or shower.
Otherwise, it can act as a trap for moisture and allow mildew to grow. Let the caulk set for as long as the package directions indicate (it's usually overnight).
Finally, you can avoid ever having to do this do it yourself home repair job again by regularly drying tub surfaces, shower walls, fixtures, and caulked areas with a clean towel.
If stains appear, try cleaning the caulking with a mildew-killer or commercially available grout-and-caulk cleaner.
Do It Yourself Home Repairs: On the Wall

If you've recently rearranged the family portraits on the living room wall or reorganized the shelving in your home office, chances are you have a wall or two that is less than picture-perfect.
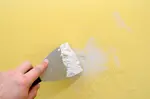
Yes, you could hang something over the holes to hide them from sight, but you can patch small holes in drywall or plaster them almost as quickly by yourself. Here's how:
Grab your vacuum and remove any loose plaster, paint chips, or dust from the hole. Using a putty knife, fill the hole with a premixed spackling compound and smooth it level with the wall's surface.
If the hole is deep, the spackling compound will shrink slightly when dry, and a second application may be needed to make the hole smooth and even with the rest of the wall surface.
A shortcut: If you have leftover latex paint that matches the wall, add a small amount of paint to the premixed spackling compound and use a putty knife to fill the hole with the paint-and-spackling mixture.
The patch may blend well enough to require no further sanding or painting if done carefully.
This works only for small holes, such as those caused by picture hooks. A larger, deeper perforation may require two applications of the spackling compound, sanding after each application has dried, and a touch-up with paint.
Do It Yourself Home Repairs Using Common Household Items
Toothpicks or matchsticks. A loose screw in a door hinge (or any wood material) can be tightened by removing the screw, inserting a few common wood toothpicks or matchsticks, breaking them off at surface level, and then replacing the screw.
Do It Yourself Home Repairs: Glue Talk
Epoxy: Used to bond different surfaces, such as glass to wood, or plastic to metal. It's waterproof, rigid, and very strong.
Polyvinyl acetate: Fancy name for the old familiar white glue in a squeeze bottle. It dries clean and strong, and is suitable for interior use on wood, paper, and ceramics.
Polyvinyl chloride: This is just the glue for broken china. It also adheres to marble, wood, or metal.
Dry bar of paraffin. Double-hung windows that don't move up and down freely can be lubricated by rubbing a dry bar of paraffin in the tracks on the sides of the windows.
This also works for wood dresser drawers or for doors that rub against their frames.
Graphite pencil. The tip of a standard graphite pencil can be rubbed on metal door latches to make them close more smoothly without banging on the latch plate in the door frame.
Wide rolls of masking tape and vinyl duck tape. Among the most valuable items for do it yourself home repairs and quick fixes are a wide roll of masking tape and another roll of ordinary vinyl duct tape.
A tear in a vinyl chair seat or car seat can be patched with heavy-duty duct tape. Strips of duct tape can also temporarily hold cracked window glass in place.
Wrapping a thickness or two of masking tape around the end of a loose chair rung and then tapping it back into its hole can provide a temporary fix.
All manner of things that break into pieces or come apart can be temporarily taped back together with duct tape until permanent repairs or replacements can be made - a cracked broom handle, cardboard storage boxes, exposed metal edges, eyeglasses, even a loose doorknob.
Everyday glue for porous surfaces. A broken cup handle can be reattached with epoxy, polyvinyl chloride, or another strong glue for porous surfaces.
You can hold it properly with masking tape while the glue dries. (Avoid putting these glued items in the dishwasher; hot water may melt the seals.)
When working with something with small parts during DIY home repairs, roll a piece of masking tape into a loop (sticky side out) and flatten it against your work surface.
Press the small items onto the tape to prevent them from rolling onto the floor and getting lost while during do it yourself home repairs.
You Might Like These:
Dealing With Wasps
Dealing with wasps: What you need to know about identifying a wasp infestation and getting rid of it safely.
Cleaning for a Healthier Home
Home may be where the heart is, but it is also where germs, dust, mold and mildew set up shop. These tips for cleaning for a healthier home can help.
Maintaining Your Garbage Disposal
Yes, you do have to maintain your garbage disposal. If you want it to keep it grinding away daily, that is. These simple tips for maintaining your garbage disposal can help.
Fix a Wall Hole
Yes, you could always just hang something over the wall hole to hide it from sight. Almost as easy? You can fix a wall hole yourself. Here's how.
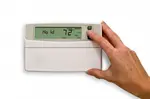
How To Prevent Plumbing Problems
How to prevent plumbing problems. You can prevent plumbing problems - a clogged drain, leaky faucets, and other common plumbing nightmares - with a little preventative maintenance.
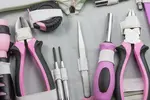
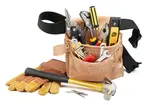
Building a Home Toolkit
Building a home toolkit. You really can handle many minor repairs and home-improvement projects around your home all by yourself. A basic toolkit is all you'll need. Here's what to include
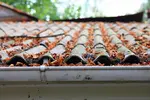
Preventative Home Maintenance Checklist
Preventative home maintenance checklist. A house may last for generations, but its parts and systems won't last a lifetime without regular attention. Tackling preventative maintenance tasks throughout the year will keep your home running smoothly.
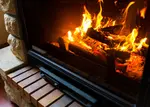
Easy Fireplace Maintenance Tips
The air is crisp; the nights are cool. What better way to complete the cozy picture than a roaring fire in the hearth? These easy fireplace maintenance tips will help get it ready to glow.


- Clean Home
- Home Maintenance
- Do It Yourself Home Repairs